
 www.renewable-living.com ```html
 Introduction: Building a DIY Warm Flat Roof This post provides a step-by-step guide on how to construct a warm flat roof that meets building regulations. A warm roof design places the insulation above the roof deck, preventing condensation and improving energy efficiency. This method differs from cold roof designs. We will cover the process from initial planning to final detailing.
Step 1: Planning and Preparation Measure and Plan: Accurately measure the dimensions of your existing roof. Create a detailed plan, noting the roof's pitch (if any), drainage points, and any existing penetrations (vents, skylights). Check Building Regulations: Consult your local building control department to understand specific requirements for flat roofs, including U-values (thermal transmittance), fire safety, and drainage. Regulations vary, so compliance is critical. Gather Materials: Based on your plans and regulations, compile a list of necessary materials. This typically includes: Roof deck material (e.g., OSB or plywood) Vapour control layer (VCL) Rigid insulation boards (e.g., PIR or EPS) Waterproof membrane (e.g., EPDM, GRP, or felt) Drainage outlets (e.g., roof drain, scupper) Flashing materials (e.g., lead, aluminum) Fasteners (screws, nails, adhesives) Gather Tools: Ensure you have the necessary tools, including: Measuring tape Saw (circular saw or hand saw) Drill/driver Utility knife Roller (for applying membranes) Heat gun (for felt roofing) Personal Protective Equipment (PPE) safety glasses, gloves, and appropriate footwear.
Step 2: Preparing the Existing Roof Deck Inspect the Existing Deck: Thoroughly inspect the existing roof deck for any signs of damage, rot, or weakness. Replace any damaged sections with new decking material. Ensure the deck is clean, dry, and free from debris. Leveling (If Necessary): If the roof deck has any significant dips or unevenness, it's crucial to level it before proceeding. Use self-leveling compound or shims to create a smooth and even surface. Cleaning: Clean the roof deck thoroughly. Remove any old roofing materials, nails, or other debris. A clean surface is essential for proper adhesion of the vapour control layer.
Step 3: Installing the Vapour Control Layer (VCL) Lay the VCL: Unroll the VCL across the entire roof deck. Overlap the edges of each sheet by at least 150mm (6 inches). Seal the Seams: Seal all seams and edges of the VCL with VCL tape. Ensure a complete airtight seal to prevent moisture from rising into the insulation. Pay close attention to sealing around any penetrations. Secure the VCL: Temporarily secure the VCL to the roof deck with staples or tape. This will keep it in place while you install the insulation.
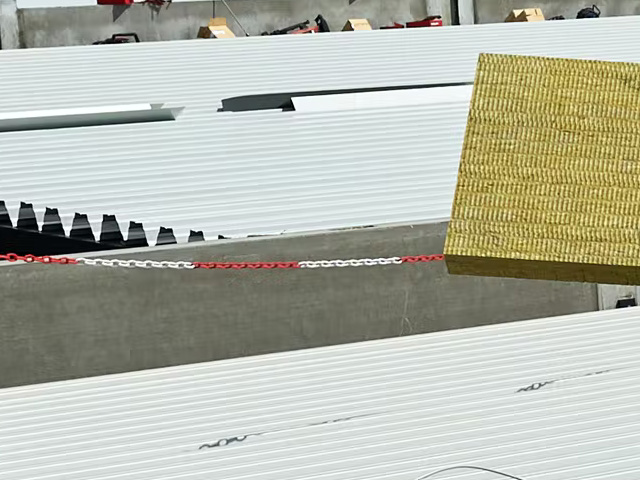
Step 4: Installing the Insulation Lay the Insulation Boards: Place the rigid insulation boards on top of the VCL. Ensure the boards are tightly butted together to eliminate gaps. Use a staggered pattern to avoid continuous vertical joints. Secure the Insulation: Secure the insulation boards to the roof deck with appropriate fasteners (e.g., screws and washers). The fastener length should be sufficient to penetrate through the insulation and into the roof deck. Follow the manufacturer's recommendations for fastener spacing. Cut Around Penetrations: Carefully cut the insulation boards to fit around any roof penetrations (vents, skylights, etc.). Seal any gaps around the penetrations with expanding foam or sealant. Multiple Layers (If Necessary): If multiple layers of insulation are required to achieve the desired U-value, stagger the joints between layers to minimize thermal bridging.
Step 5: Installing the Waterproof Membrane Choose Your Membrane: Select the appropriate waterproof membrane based on your budget, roof size, and desired lifespan. Common options include EPDM rubber, GRP (fiberglass), and felt roofing. Prepare the Surface: Ensure the insulation surface is clean, dry, and free from any debris that could damage the membrane. Apply the Membrane: Follow the manufacturer's instructions for installing the chosen membrane. This may involve: EPDM: Applying adhesive to the insulation and rolling out the EPDM sheet. GRP: Applying a resin and fiberglass matting in layers. Felt: Applying hot bitumen or using a self-adhesive felt system. Seal the Seams: Pay close attention to sealing all seams and edges of the membrane. Overlap the edges according to the manufacturer's recommendations. Flashing Details: Install flashing around all penetrations (vents, skylights, parapet walls) to prevent water ingress. Use appropriate flashing materials such as lead or aluminum.
Step 6: Drainage and Finishing Install Drainage Outlets: Install roof drains or scuppers to ensure proper drainage of rainwater. Connect the outlets to the existing drainage system. Edge Trim: Install edge trim around the perimeter of the roof to protect the membrane edges and provide a neat finish. Final Inspection: Conduct a thorough inspection of the completed roof. Check for any leaks, gaps, or imperfections. Apply a Protective Coating (Optional): Consider applying a protective coating to the membrane to extend its lifespan and improve its appearance.
Conclusion: Enjoying Your New Warm Flat Roof Building a warm flat roof requires careful planning, attention to detail, and adherence to building regulations. By following these steps, you can create a durable, energy-efficient roof that protects your building for years to come. Remember to always prioritize safety and consult with professionals if you are unsure about any aspect of the project. Good luck!
``` Warm Flat Roof Construction: Explained
 flat-roof-company.co.uk
 Which Is Better Warm Or Cold Flat Roof- Find The Best!
 roofhit.com
 Insulated-warm-roof-flat-roof
www.renewable-living.com


0 komentar:
Posting Komentar